Intro to Procedural Animations
Ah, I see you want to make some cool stuff. Splendid! Don’t be scared, procedural animations are easier than they sound.
What is a procedural animation
Section titled “What is a procedural animation”It’s an animation that is generated based on prompts, ha, no it’s not.
Do not confuse procedural animation with generative AI. The effect is 100% based on logic and input parameters, not a black box.
Crucial animation nodes
Section titled “Crucial animation nodes”Without these, you’ll have a hard time animating.
Time node is essential to get the active frame or normalized time of the animation, while easing provides tons of built-in smoothing operations. Don’t worry, we’ll get to that soon.
Basically all nodes in Animation category are your friends.
The simplest procedural animation
Section titled “The simplest procedural animation”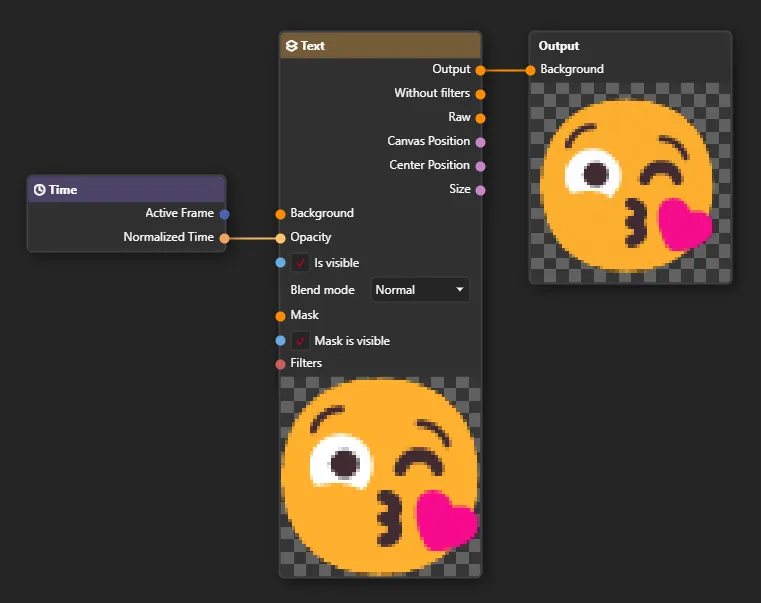
Will produce
Neat, isn’t it?
Let’s break down what happens here.
- Time Node exposes Normalized Time - which is a value between 0 and 1. Where 0 is start of the animation and 1 is end of it. For 2 second animation, normalized time at 1 second will equal
0.5. - We are connecting Normalized Time to Image’s Opacity. So at the beginning of the animation, the image will be transparent (
0opacity) and fully opaque at the end (1opacity).
Let’s make something slightly more sophisticated.
Section titled “Let’s make something slightly more sophisticated.”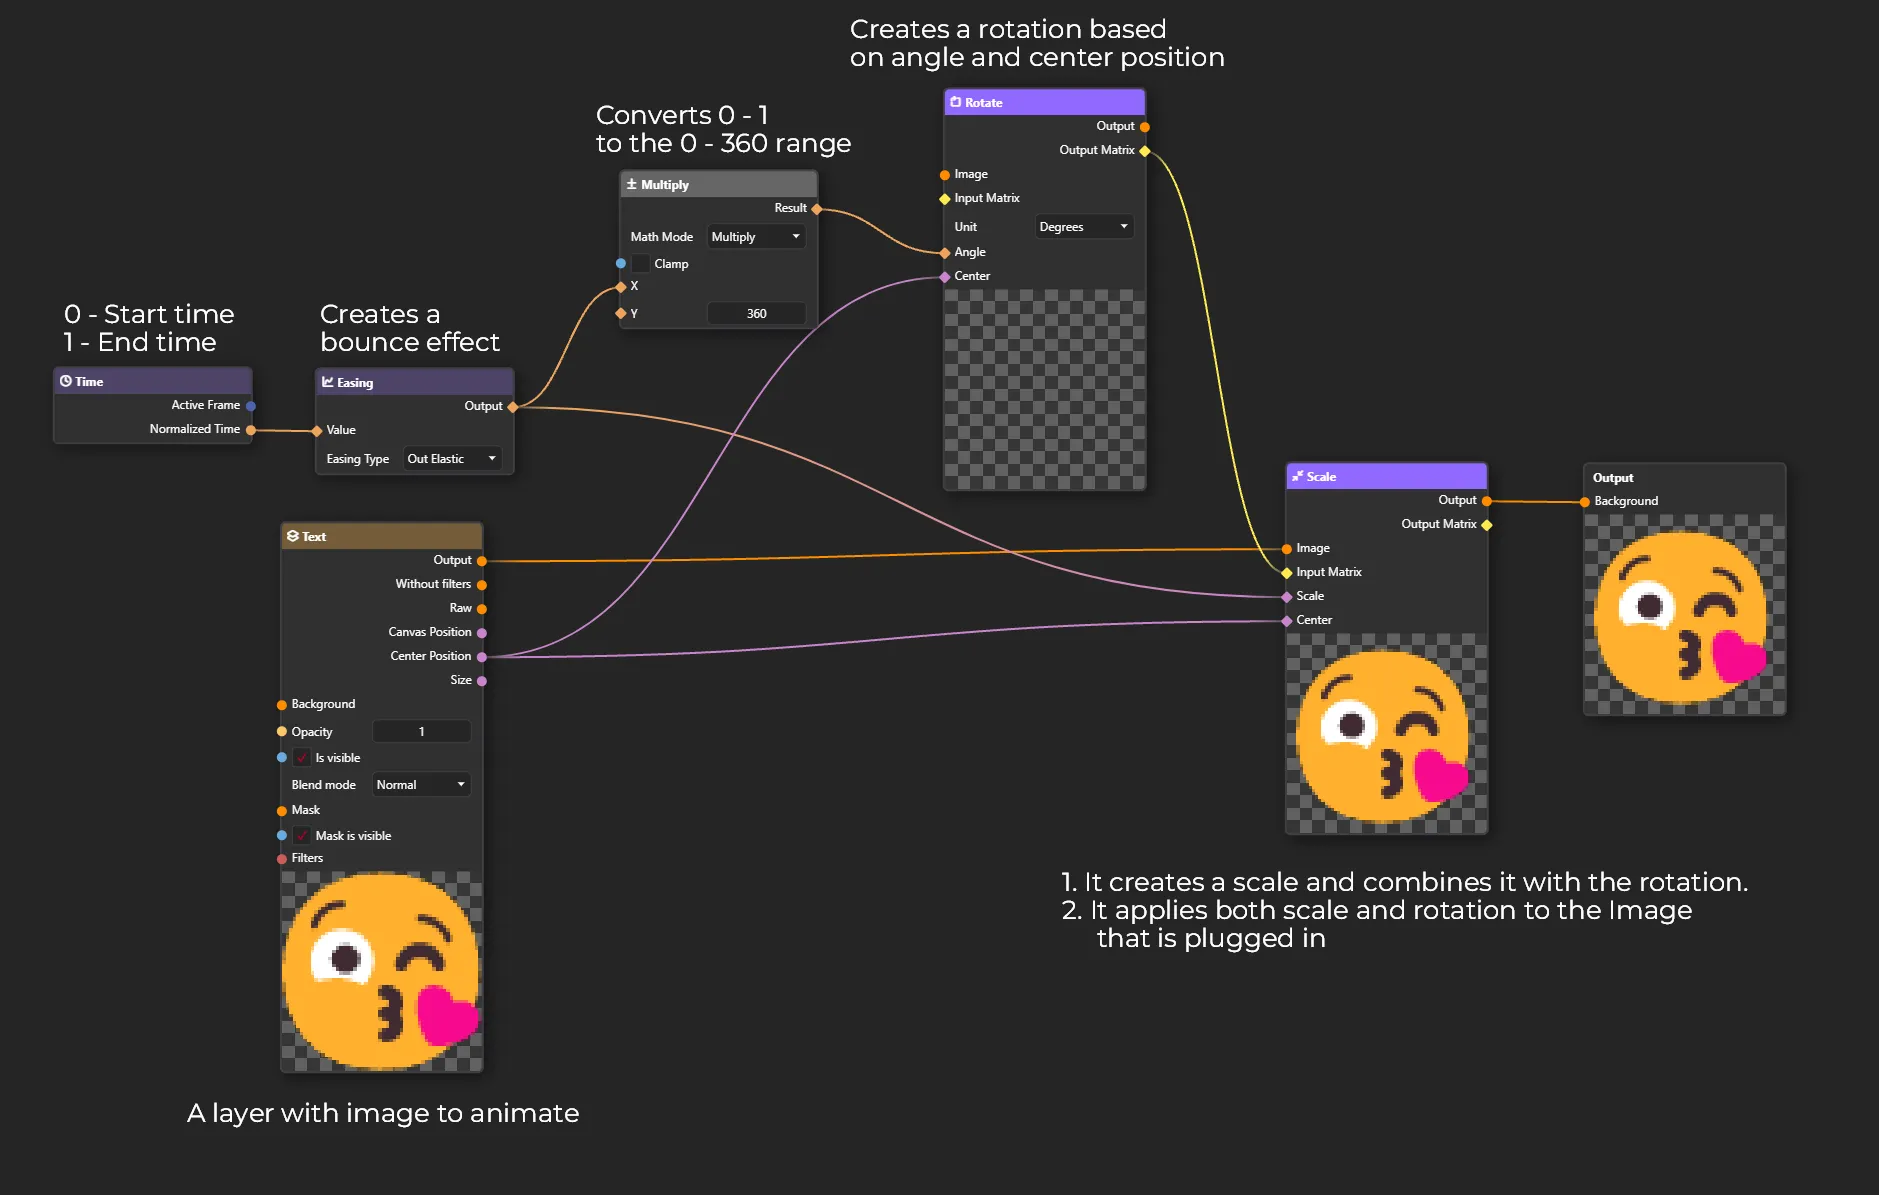
The core concept in this graph is:
- Get the time of the animation (0 - 1 range)
- Create a smoothing effect (elastic in that case) by plugging our time to Easing node. Read more about easings here.
- Create a rotation + scale effect by combining two nodes with “Matrix Input” and “Matrix Output”
- Scale can be directly connected with easing, because we want it to go from invisible (0 scale) to full size (1 scale)
- Rotation must be in 0 - 360 range to make image rotate in a full circle. This is done by multiplying eased time by 360.
- At last, we are plugging our source image to the Scale Node. In our case Scale Node not only scales but also rotates, because we plugged in the result of rotation to it. You can combine multiple effects into one with yellow (Matrix) inputs.
And the effect:
The possibilities are truly endless. Take your time, play around with nodes and just have fun, this is the best way to learn.
All of our content is carefully written by hand, no AI was involved during the process.