Custom Workspaces
Introduction
Section titled “Introduction”PixiEditor’s Node Graph not only allows for advanced rendering and image manipulation, but also allows you to configure the editor itself.
You can create custom workspaces, define custom exports and previews.
What is a workspace?
Section titled “What is a workspace?”A workspace is a vague term, but in essence, you can define a workspace “A setup of the editor that speeds up a certain workflow/process”. A workspace can be a set of viewports displaying different things.
Let’s say you want to texture a cube. The usual workflow might look like this:
- Edit a texture in 2D drawing software.
- Export the texture.
- Import the texture into a 3D software.
- Preview changes
- Repeat steps 1-4 until satisfied.
With PixiEditor, we can speed up this process into a single step.
Cube texturing workspace example
Section titled “Cube texturing workspace example”Let’s look at a Cube Texturing workspace that is available in Founder’s Pack (coming soon)
This workspace consists of two viewports:
- Texture Editor: A viewport that allows you to edit the texture of the cube.
- Cube Preview: A viewport that displays the cube with the texture applied.
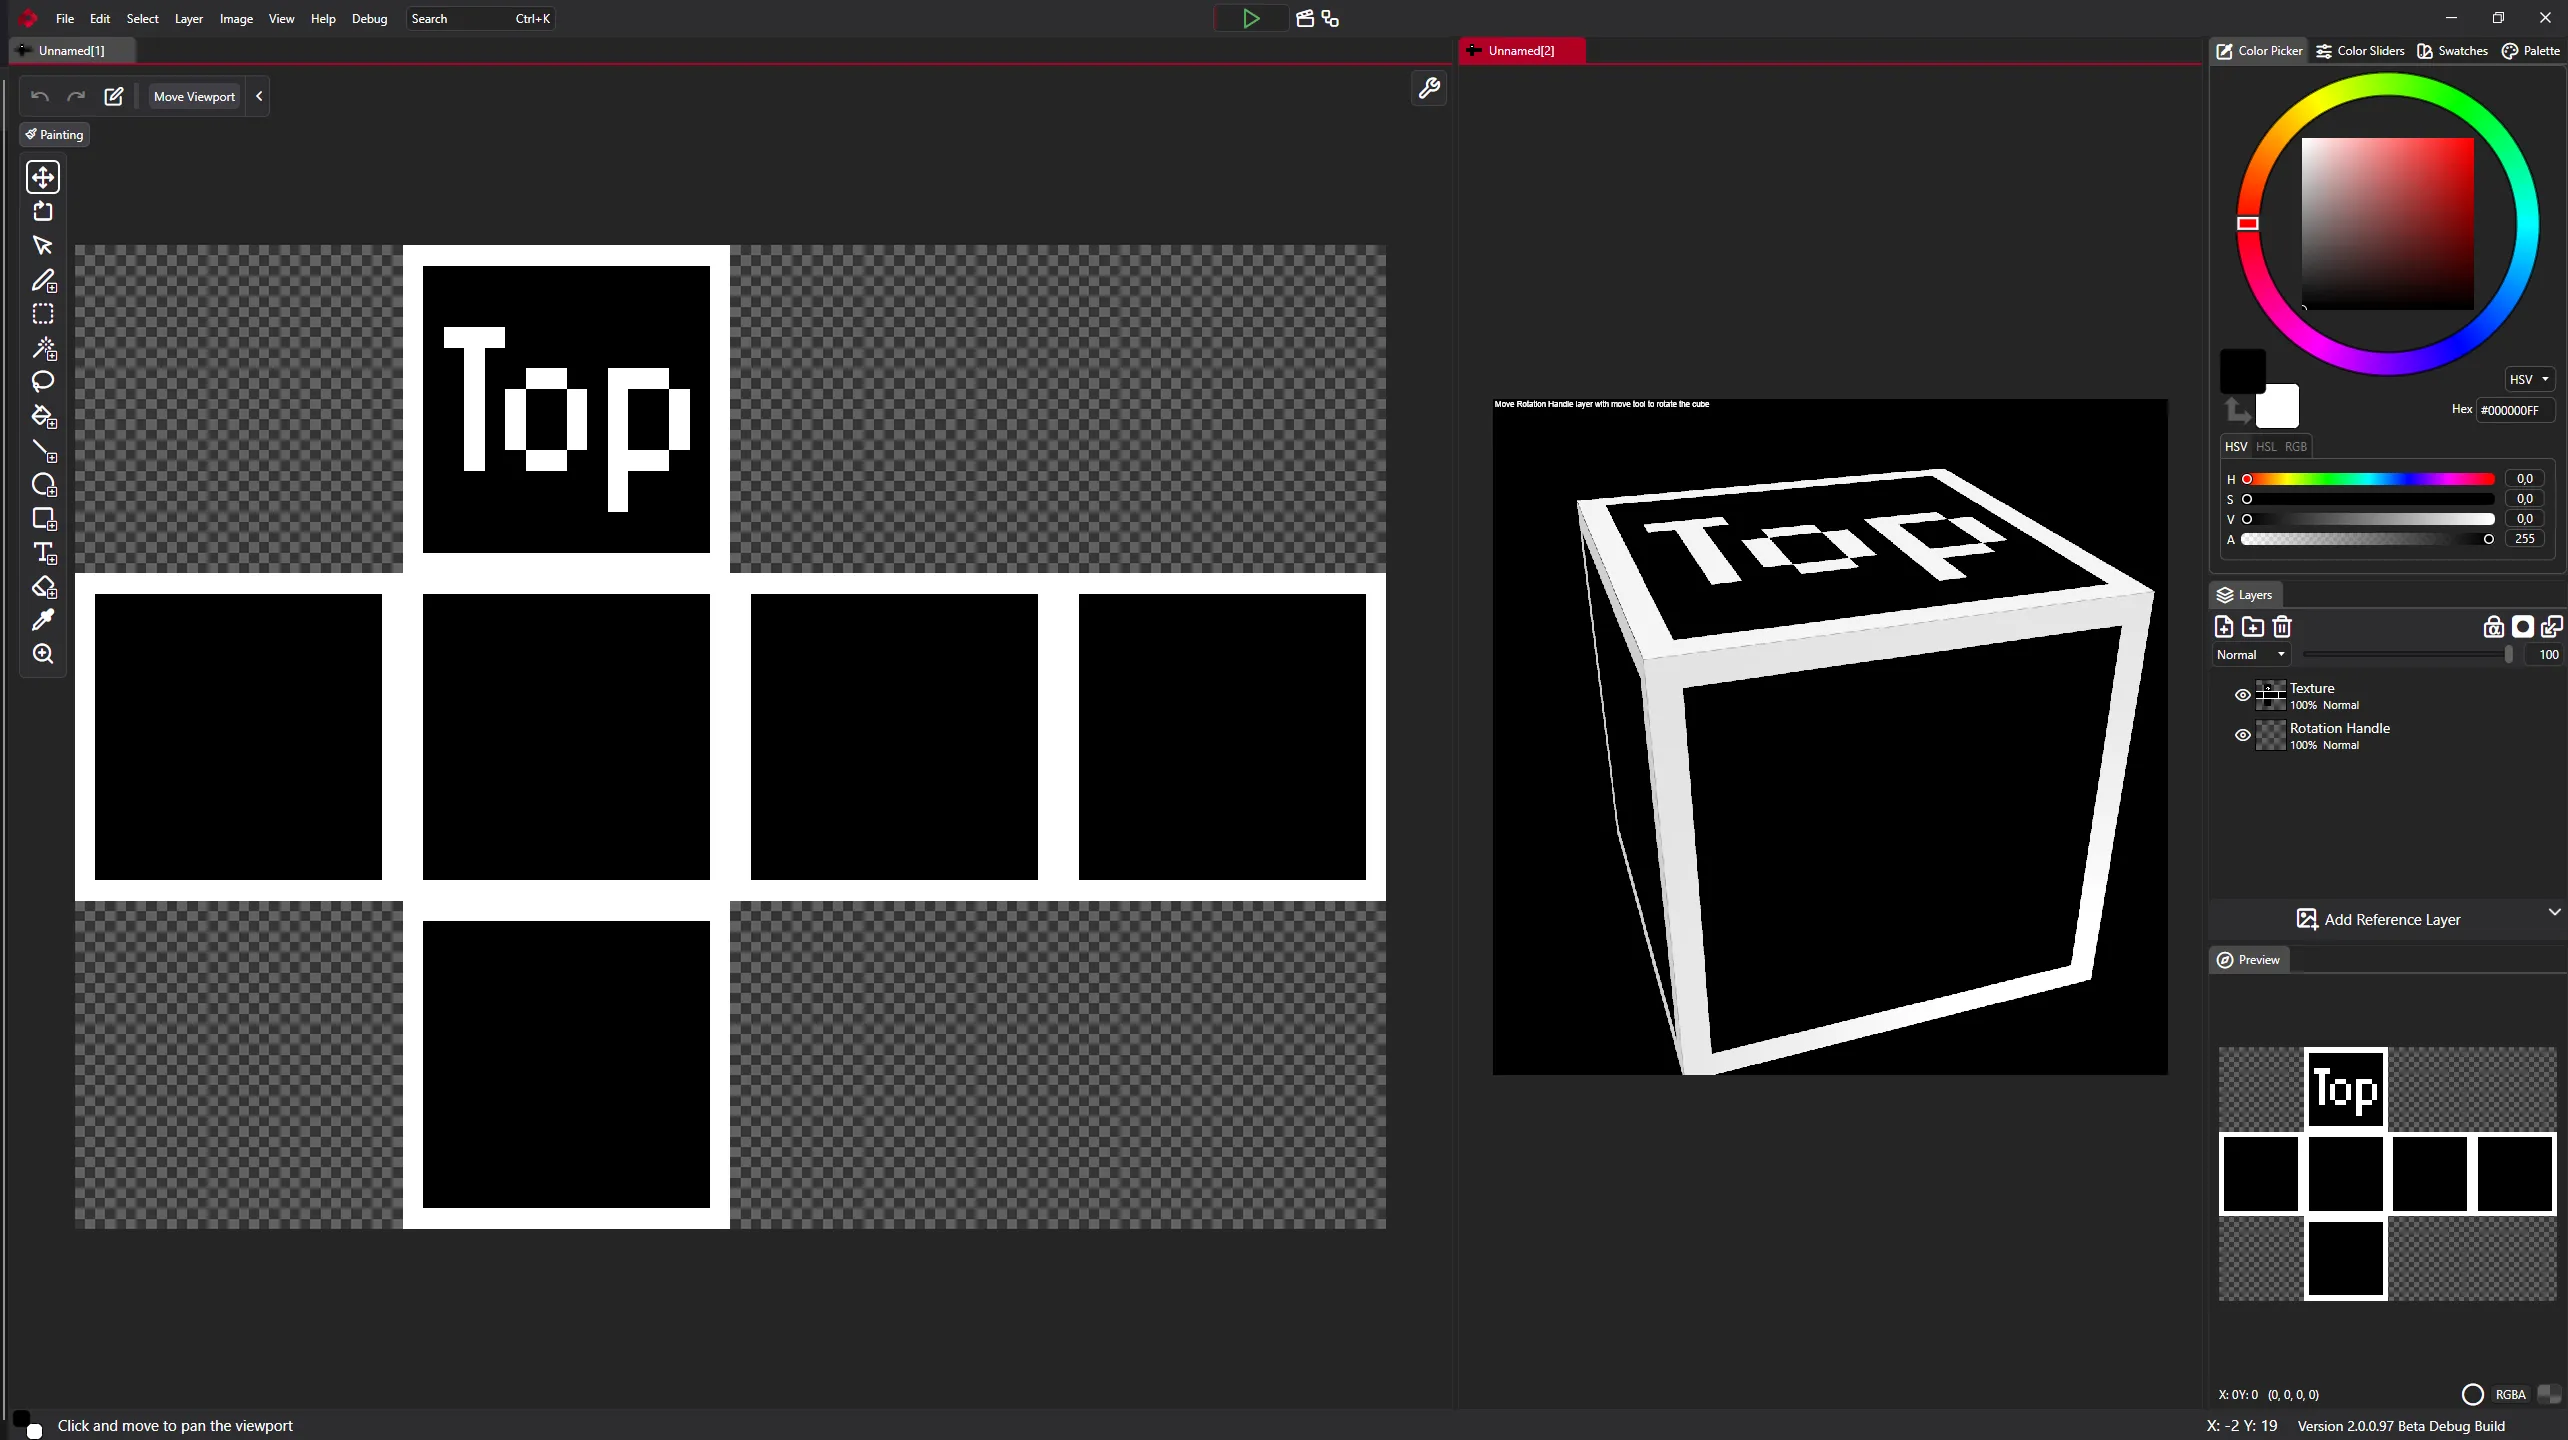
This is a single document with 2 viewports. One displays main output, and another displays a custom output (3D preview).
Note that the document has size 64x48, which is the size of the texture we are editing. However the Cube Preview is much larger.
This is possible thanks to the Custom Output node, which allows you to define a custom output with a specific size and export settings.
Creating a custom workspace
Section titled “Creating a custom workspace”Before we start creating a custom workspace. Let’s learn how to open two viewports for the same document.
- Open the document you want to edit.
- Click View -> New window for current image.
New tab will open with the same document. You can now arrange the viewports as you like.
Creating a custom output
Section titled “Creating a custom output”- Head to the Graph View and create Custom Output node.
- Set the Output Name to something meaningful, like “My output 2”.
- Set the Size to the desired output size, for example (1024, 1024) for a large texture.
If you now go to the viewport settings ( icon in top-right of the viewport), you will see that the custom output is available for selection under “Render preview” dropdown.
Now if you connect something like a Noise Node to the Output and Custom Output, you will see that both outputs have different resolutions.
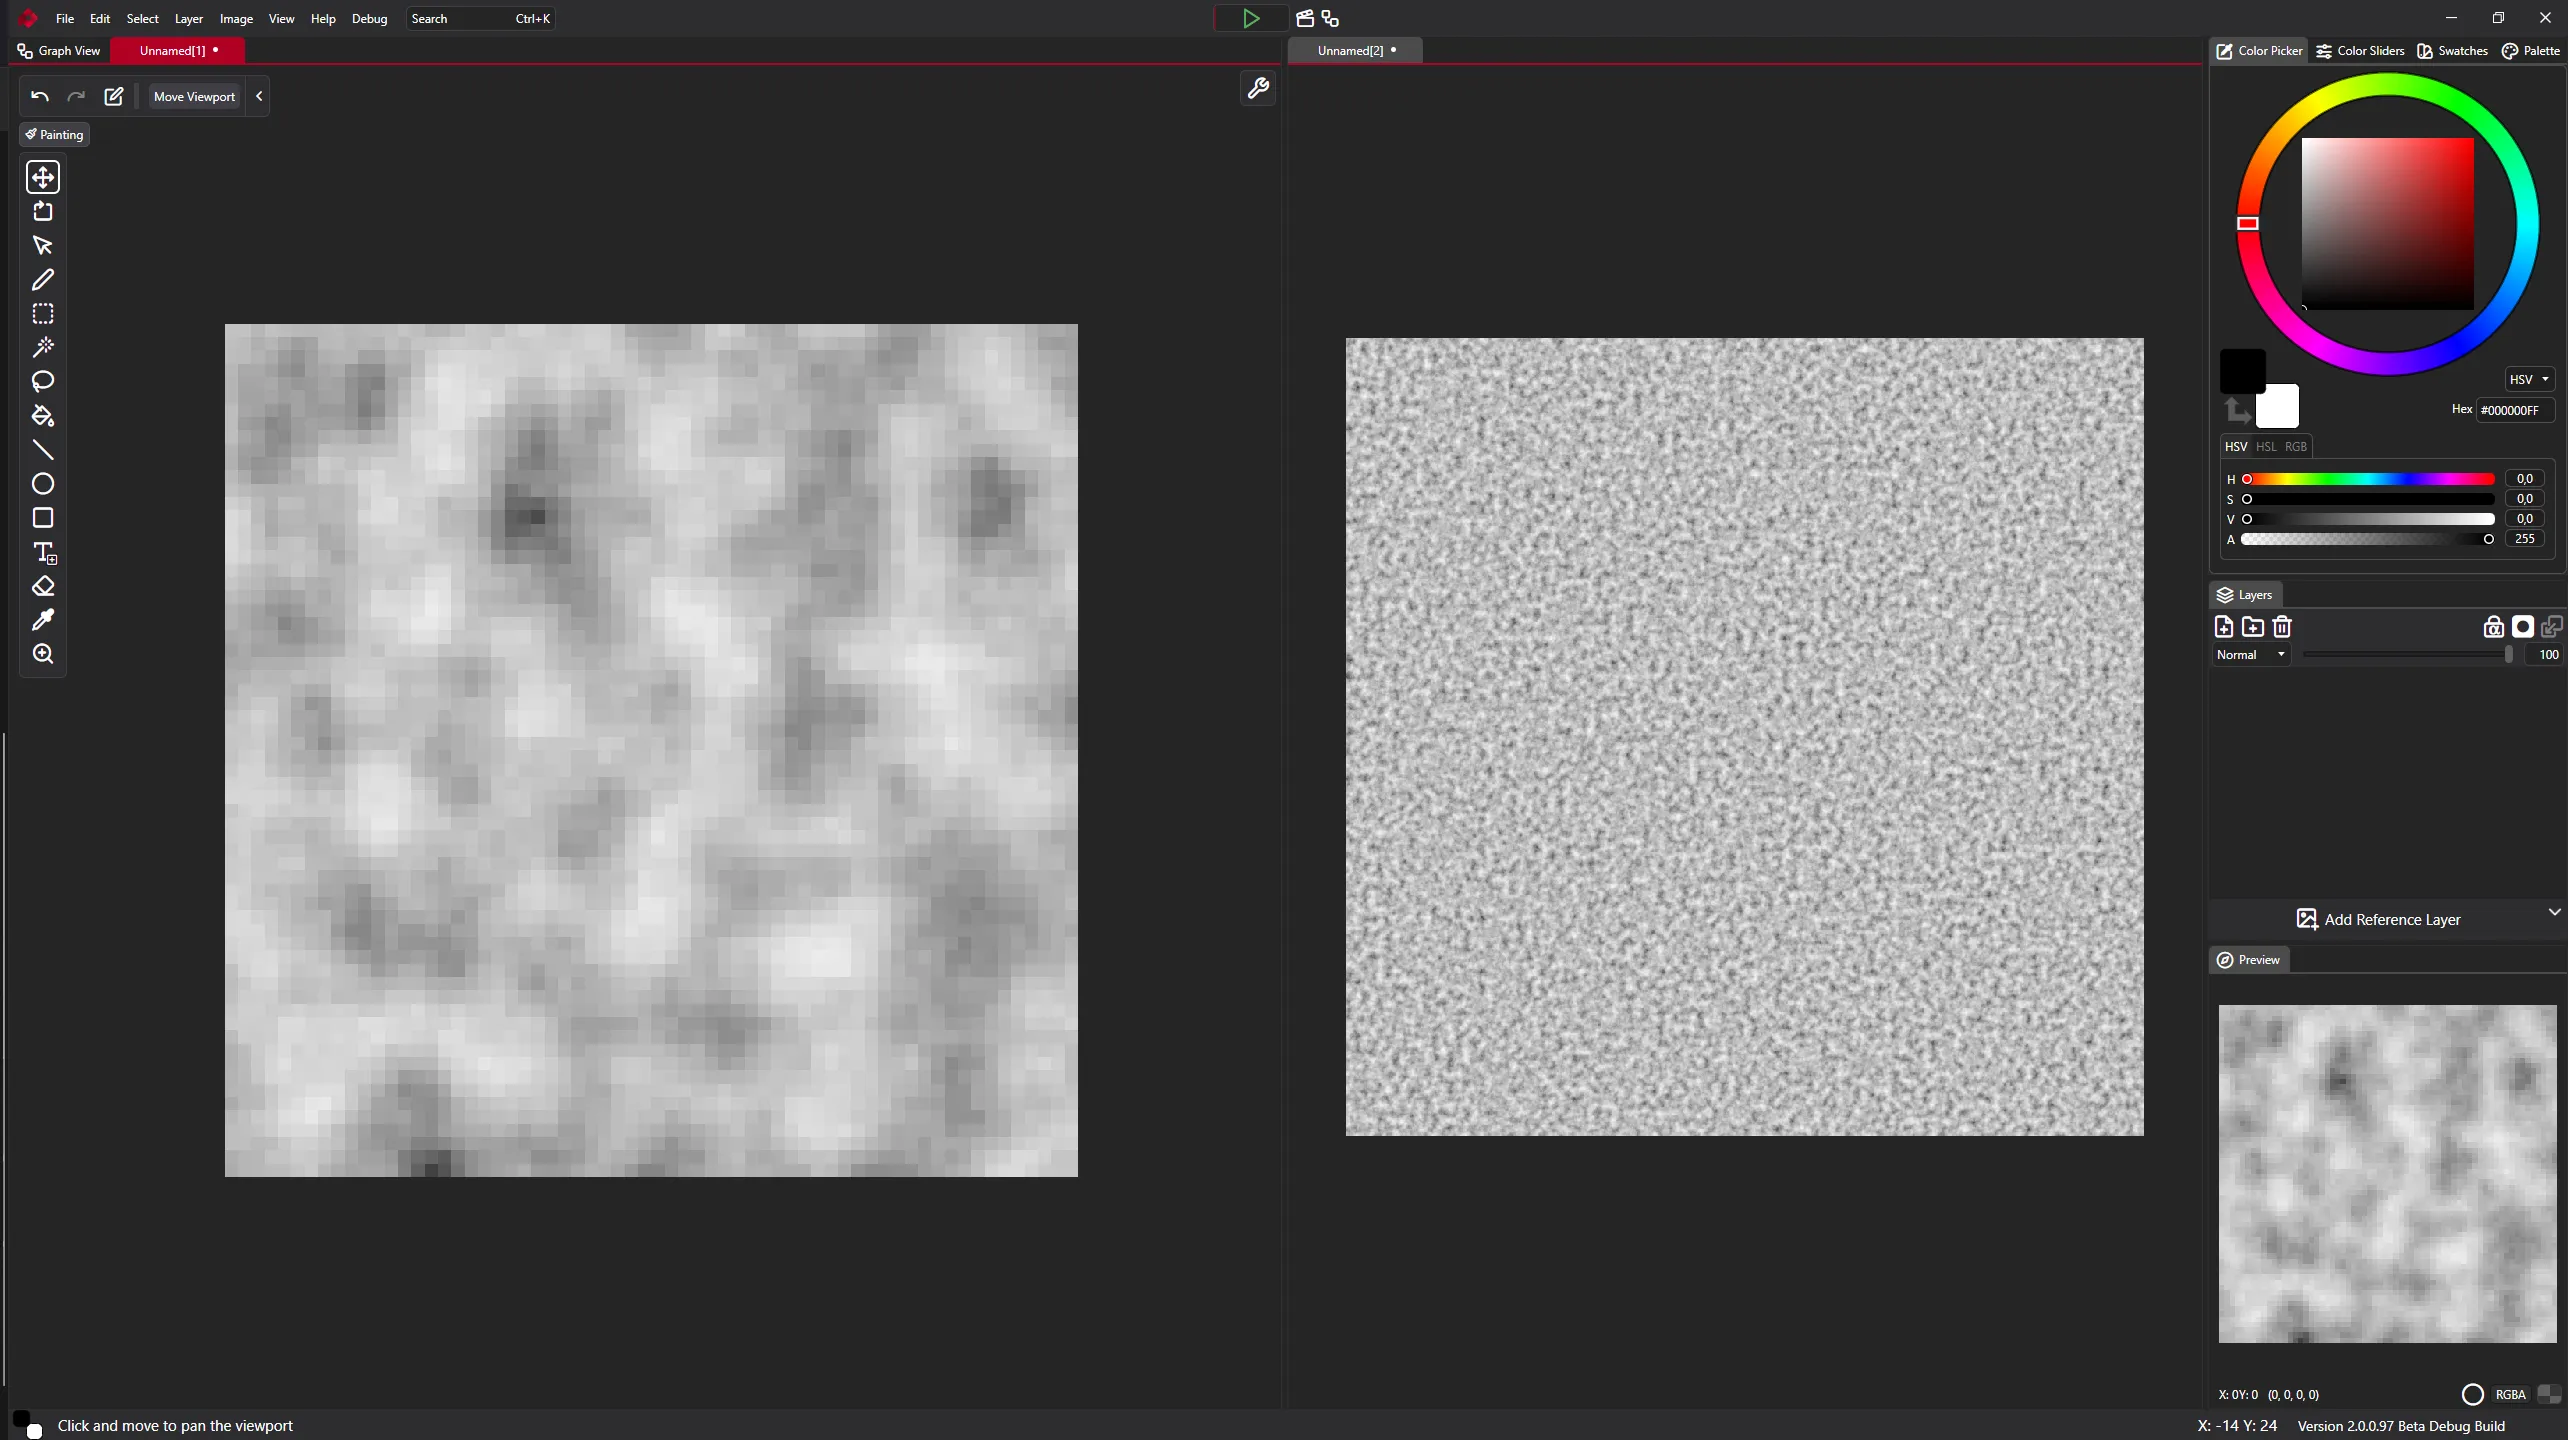
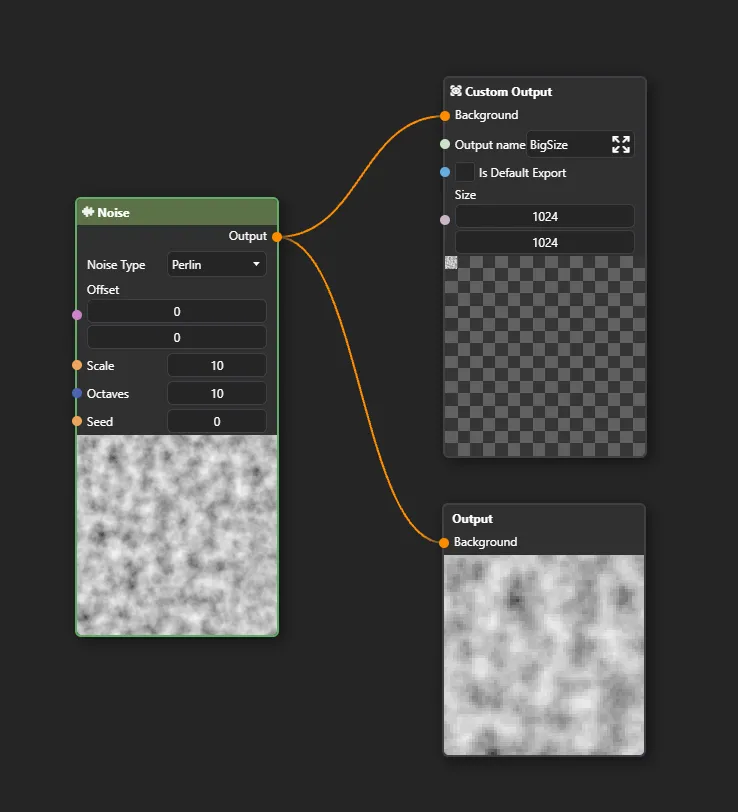
Your custom output is also available in export menu.
Can you have different resolutions for different outputs?
Can you have multiple custom outputs?
Are custom outputs available in export menu?
All of our content is carefully written by hand, no AI was involved during the process.