Your First Graph
First of all, congratulations on deciding to learn about Node Graphs in PixiEditor! It’s a fascinating and powerful system, you won’t regret it.
Creating Your First Node Graph
Section titled “Creating Your First Node Graph”If you didn’t read the Getting Started with Nodes guide, we recommend you to do so first. It will help you understand the basics of nodes and how they work.
Without further ado, let’s create your first Node Graph!
- Create a new document in PixiEditor by going to
File -> New. - Open the Node Graph by clicking the button in the top center of the window or by going to
View -> Open Tab -> Graph View. - You will see a Node Graph with a single layer connected to the Output Node. This is the starting point of your Node Graph.
Adding Nodes
Section titled “Adding Nodes”Now that you have your first Node Graph, let’s add some nodes to it.
Right click or hit Space on the empty area, this will open a context menu with a list of available nodes. You can type the name of the node you want to add in the search bar.
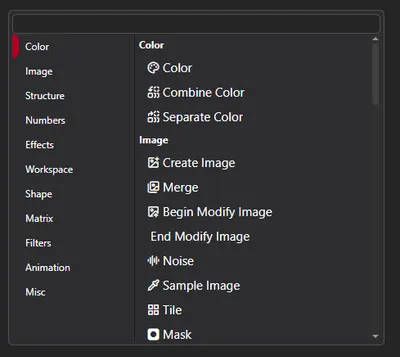
Node Types
In version 2.0.0.97, there are several types of nodes available:
- Color - Nodes such as Separate Color into RGB, HSV, and HSL, which allow you to manipulate colors in various ways.
- Image - It’s a big category with various nodes, such as Create Image, Mask, Noise, and more, which allow you to work with images.
- Structure - “Structure” in PixiEditor refers to the elements in a layer tree. This includes Image Layers, Vector Layers and Folders.
- Numbers - Various numerical related nodes, most notably the Math node, which allows you to perform mathematical operations on numbers.
- Effects - Standalone effects such as Raster Outline or custom Shader
- Workspace - Nodes that allow for workspace cusomization - multiple outputs and export zones.
- Shape - Nodes that allow you to create and manipulate shapes
- Matrix - Matrix related nodes, such as Transform, which allow you to manipulate the position, rotation, and scale of nodes.
- Filters - Nodes that contain various filters - for example, Blur, Shadow, and Color Correction.
- Animation - Nodes that allow you to create procedural animations.
- Misc - Miscellaneous nodes that don’t fit into any other category, such as Document Info.
-
Let’s add a Shadow Filter node. You can find it in the Filters category. Click on it to add it to the Node Graph.
-
Click on the red-ish circle ⬤, next to the “Filter” label, on the right side of the Shadow Filter node, and drag it to the “Filter” socket with the same color in the Base Layer node (on the left side of the node).
-
Now go back to your document (make sure Base Layer is selected in the Layers panel) and try drawing something. You should see a shadow effect applied to your drawing!
Sockets
Section titled “Sockets”You may have noticed that the nodes have different colored circles and diamonds on their sides. These are called sockets. They are used to connect nodes together and transfer data between them. To learn more about sockets, check out the Sockets guide.
All of our content is carefully written by hand, no AI was involved during the process.